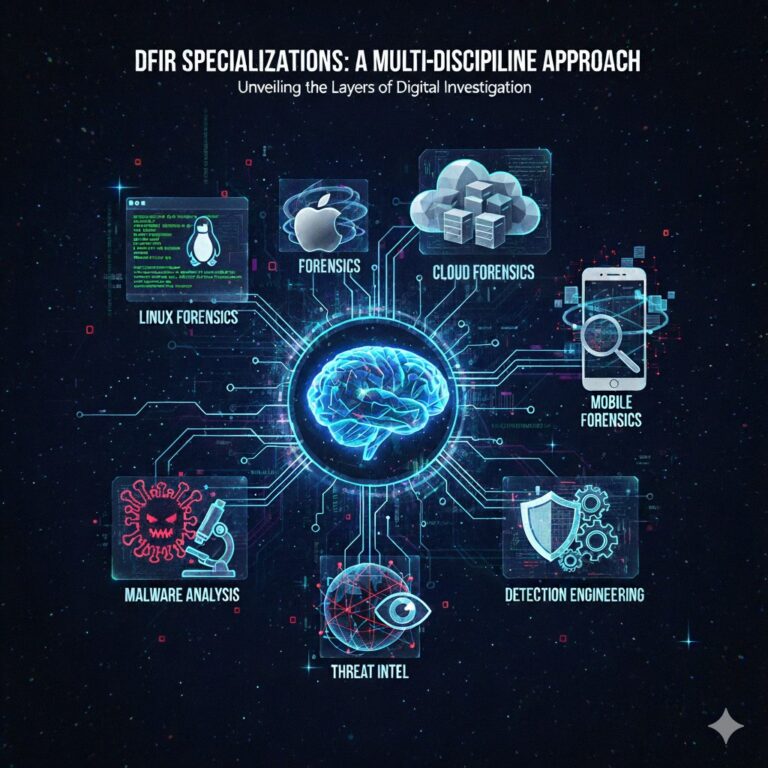
Introduction
Welcome to Part 3 of my 5 Part blog series, “How To Break Into DFIR”. Part 3 will focus on understanding the basics of Windows Memory Forensics and what resources you should focus on to get this understanding. This is typically a straightforward transition from understanding the basics of Windows Forensics from an endpoint perspective to understanding the basics of Windows Forensics from a memory perspective. As I did with my previous blog, I’m going to share the resources I used to better understand Windows Memory Forensics and as I said previously, these resources will be more beneficial if followed in the particular order that I list so there is natural progression with your learning.
Step 1 – Watch 13Cubed Playlist – Introduction To Memory Forensics
Once again 13Cubed’s YouTube Channel run by Ricard Davis will be highlighted as in Part 2 of this blog series. 13Cubed has created so much content at this point not only on his YouTube channel, but his own personal training as well (more on that later). Included in this content is of course a Windows Memory Forensics playlist titled, Introduction To Memory Forensics. This playlist was first created back in 2017 but is still extremely reliable when it comes to understanding the core concepts of Windows Memory Forensics. Richard Davis does an outstanding job of methodically explaining each concept in depth so it is extremely easy to follow. As of this writing, this playlist consists of 12 videos, each covering a particular Windows Memory Forensics artifact or topic, culminating in the final video where Richard introduces his paid Windows Memory Forensics training course which I’ll go into detail later in this blog. As always, I highly recommend you start with 13Cubed’s playlist before looking elsewhere.
Step 2 – Windows Memory Forensics Cheat Sheets
This takes us to step 2 which is leveraging the many Windows Memory Forensics cheat sheets that are freely available. These become extremely handy once you have a basic understanding of the most important Windows Memory artifacts. Similarly to Windows Endpoint Forensics, there are many artifacts in Windows Memory Forensics to remember so having these cheat sheets available at your disposal is highly recommended. Here is a list of some of the best cheat sheets for Windows Memory Forensics (Be sure to keep these links handy):
- SANS Memory Forensics Cheat Sheet v3.0
- SANS Memory Forensics Analysis Poster
- SANS Rekall Memory Forensic Framework Cheat Sheet v3.1
- SANS Memory Forensics Cheat Sheet 2.0 Mind Map by Andrew Rathbun
- Volatility Cheat Sheet by HackTricks
- Volatility Cheat Sheet by Ashley Pearson
As a bonus, it is also highly recommended to read the best Memory Forensics book out there – The Art of Memory Forensics!
Step 3 – Watch 13Cubed Video – Pulling Threads
Now this is where things get really fun! By the time you reach Step 3, you should have taken a few months (typically 2-3 months) to really absorb all of the material from Step 1 and Step 2 before diving into this next step. With Step 3, you will now start to gain some hands-on experience and this will carry through the next few steps as you get accustomed to performing Windows Memory analysis.
13Cubed’s YouTube video, Pulling Threads is the next resource you should leverage. In this video, Richard also goes over how to perform Windows Memory analysis using Volatility (arguably the most widely used open-source tool to perform Windows Memory analysis) on a Windows 10 image that was potentially infected with malware. He explains how to use Volatility to look for suspicious processes, how to look at network artifacts to discover any potentially malicious network traffic, and he discusses ways to detect process injection and process hollowing. He caps it off by explaining how to dump a process for further analysis. Keep in mind, Richard provides the memory sample that he used from the video (which can be found in the video description) so that you can walk through the process with him in real time. This is a very simple, and appropriate first hands-on exercise you should embark on when looking to get reps on performing Windows Memory analysis since it is a guided video.
Step 4 – Watch 13Cubed Video – Mini Memory CTF – A Memory Forensics Challenge
Step 4 begins to ramp it up a bit with this next 13Cubed video titled, Mini Memory CTF – A Memory Forensics Challenge. In this video, Richard provides yet another memory sample for you to dive into, but this is a truer CTF in that it is not a guided video as the previous video is. Keep in mind, the previous video, Pulling Threads, should be watched before attempting this video as it is more of a pre-requisite to this video. By now, you should be familiar with performing Windows Memory Analysis with Volatility so applying what you learned from the last video is going to be extremely beneficial for this hands-on exercise. Richard provides the following materials in the video description – Memory Sample, Mini Memory CTF Solutions Guide, and 4 CTF questions for you to answer using the Memory Sample.
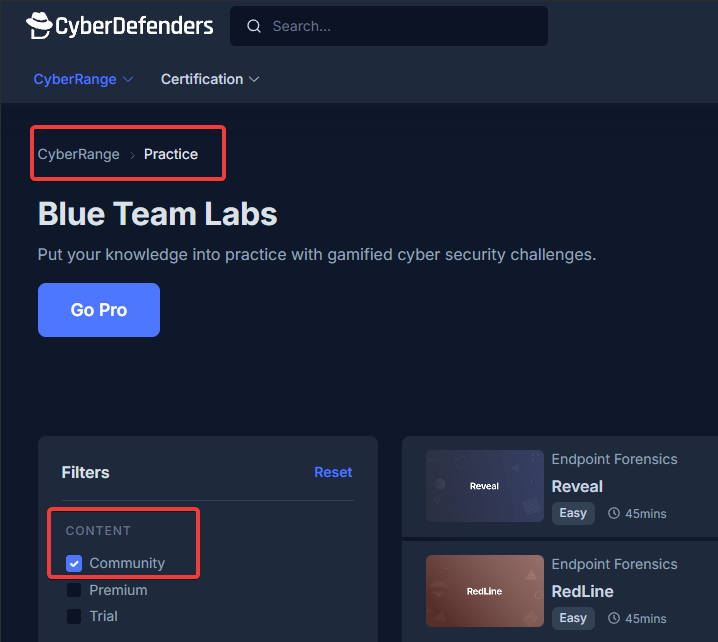
Step 5 – Log into your previously created CyberDefenders Account and Complete Some Windows Memory Forensics Labs
Step 5 is where you’ll dive into labs on CyberDefenders that I found to be extremely helpful. As mentioned previously in Part 2 of this blog series, you can filter in the free tier titled, “Community” under the “Content” section. This can be found in the “Practice” section under the “CyberRange” dropdown. See the image below:
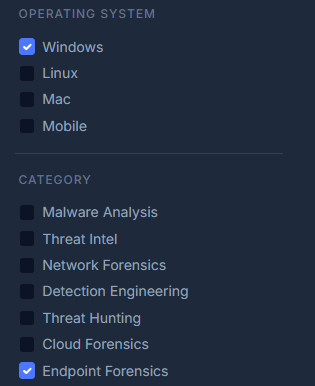
Once you are filtered on the “Community” content, the best place to start on CyberDefenders if you are wanting to get hands on experience with Windows Memory Forensics labs, is to filter on “Windows” under the “Operating System” section, and “Endpoint Forensics” under the “Category” section. Then type “Memory” in the search bar. See the images below:

Here you will find many labs that are focused on Windows Memory Forensics. As mentioned in the previous blog, the Szechaun Sauce lab is highly recommended as it includes memory dumps of the workstation and domain controller. Another lab I highly recommend to start off with is NintendoHunt by none other than 13Cubed!
Step 6 – Complete MemLabs CTF
The final set of CTFs and Labs that I highly recommend is MemLabs by my colleague stuxnet999 also known as Abhiram Patiballa. Abhiram has a deep background in Windows Memory Forensics, and he has carefully crafted one of the best Memory Analysis CTFs out there, particularly geared towards those that are looking to get started with Memory Forensics! MemLabs consist of 7 Labs, (Lab 0 – Lab 6) which range from Easy to Hard difficulty as you progress. With the various 13Cubed CTFs / Labs, CyberDefenders, and MemLabs, you can feel confident that you have gained enough hands-on experience before performing Windows Memory Analysis on a real-world engagement.
Step 7 – Complete 13Cubed Course and Certification – Investigating Windows Memory
Steps 7 and 8 will now dive into the final section of Windows Memory Forensics which is formalized training. After obtaining all of the artifact knowledge, getting acclimated with the tools and resources, and gaining some hands-on experience with all of the labs I previously mentioned, the next natural step in the process is to get a certification through formalized training. Once again, I’m going to highly recommend you look no further than 13Cubed! Richard Davis has created a set of courses that are affordable and that included Windows Memory Forensics. His course, Investigating Windows Memory will give you everything you’re looking for in a Windows Memory course. It currently includes 55 lessons along with 365-day access. Once you finish this course, you will have the opportunity to take a knowledge assessment and earn the certification. At the time of this writing, 13Cubed’s “Investigating Windows Memory” course is priced at $795 USD. I know for some this can seem very expensive, but it is a great investment as the quality of the content is worth the price!
Step 8 – Complete SANS Course FOR508: Advanced Incident Response, Threat Hunting, and Digital Forensics and Obtain the GCFA certification
Similar to 13Cubed’s “Investigating Windows Memory” course, FOR508: Advanced Incident Response, Threat Hunting, and Digital Forensics is yet another formalized training opportunity that will better prepare you to work with Windows Memory Images. Keep in mind, this course is not a Windows Memory Forensics dedicated course as this course is a progression from FOR500: Windows Forensic Analysis, but there is a whole day dedicated towards Windows Memory Analysis. During this day, you will learn various Windows Memory Forensics topics such as: Endpoint Detection and Response (EDR) which goes over some EDR Capabilities and Challenges when it comes to Memory Forensics, Memory Acquisition which dives into how to acquire System Memory, Hibernation and Pagefile Memory Extractions, etc., Memory Forensics Analysis Process for Response and Hunting which dives into understanding common Windows Services and Processes, how to identify Rogue Processes, how to Analyze Process Objects, etc., Memory Forensics Examinations which will go into depth on performing Live Memory Forensics, Code Injection, Malware, and Rootkit Hunting in Memory, etc., and finally Memory Analysis Tools such as Velociraptor, Volatility, and MemProcFS.
Once the course is over, you will have the opportunity to become certified by obtaining the GIAC Certified Forensic Analyst (GCFA) certification. Having this SANS training and GIAC certification under your belt along with the GIAC Certified Forensic Examiner (GCFE), will just further solidify your understanding of Windows Forensics. The only downside to this training is of course the price point. At the time of this writing, FOR508 by SANS is priced at around $8,780 USD without the GCFA certification which adds another $999 USD to the final total. However, some employers provide this training to their employees early in their tenure. So, in order to realistically pay for this course, it is recommended that you are currently working in a DFIR capacity at a company that also has training opportunities included such as SANS.
Conclusion
As you have read through this blog post, you have been able to see there is a natural progression with each of the above outlined steps. The order of these steps was fully intended to help guide you through your journey in a way that is realistically paced for a successful breakthrough into DFIR and continued success as you gain experience under your belt. As long as you follow each step, and spend the right amount of time on them, you should have the necessary tools and resources at your disposal to succeed. Keep in mind, everyone learns at their own pace, and some have less time in their day to dedicate the number of hours necessary to successfully accomplish each step so be sure to spend the time you feel is aligned with your pace and makes sense for you.
The next blog in this 5-part series will focus on Threat Hunting.